Setup the GitHub CLI
Installation
The easiest way to install the GitHub CLI (henceforth gh) under Linux or Mac is to use Homebrew:
brew install ghUnder Linux, gh is also available via snapd on the edge channel (dev builds).
sudo snap install --edge ghAnd under Windows, we can just use the MSI Installer.
Other installation instructions and methods are available at cli.github.com/manual/installation.
Authentication
Before using the gh, first, we need to authenticate in GitHub. To do that we run the following command in the terminal:
gh auth loginWe see that gh wants us to choose between the Github.com account and the Github Enterprise Server account. The first one is a regular account we use to work in GitHub. Besides this, GitHub offers enterprise services, and the Github Enterprise Server account refers to that. See the page.

For now, let’s choose a regular Github.com account. The next step requires us to choose an authentication method, either via a web browser or via an authentication token.

1. Login with a web browser
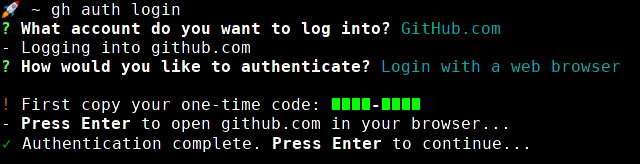
The first method will provide us one-time code which we should paste on the GitHub authentication page located at github.com/login/device. This will authorize our device and it will be able to access our gists, teams, and repositories.
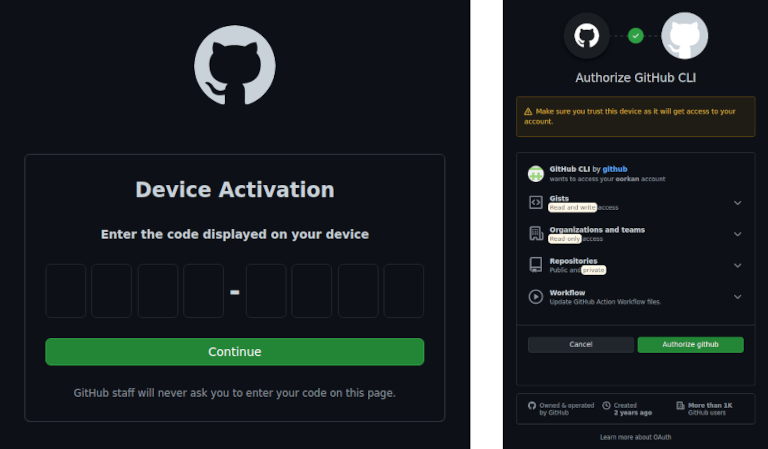
If everything runs smoothly, we’ll see the Authentication complete message in the terminal.
2. Login with an authentication token
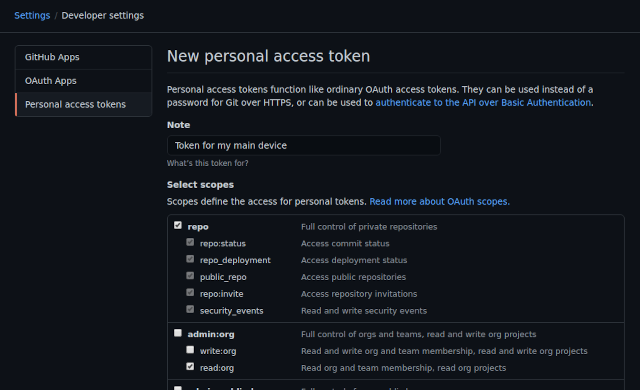
The second login method can be achieved by generating a personal authentication token in GitHub. To do that, we should go to github.com/settings/tokens.

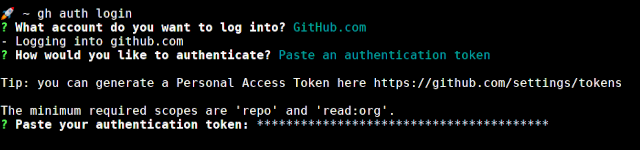
Once we click on the “Generate new token” button, a new window will open where we should describe the token and choose the permission scopes. GitHub CLI requires us to have at minimum repo and read:org permission scopes.
We can now copy our newly generated token and paste it in the terminal.
The last step: choosing a git protocol
Now, when we are authorized either via a web browser or an auth token, we can move to the last step, where we choose a Git protocol being used to interact with the GitHub host. We have two options there: HTTPS and SSH. I prefer to use SSH. If everything runs smoothly, we’ll be able to verify that we are logged in by running:
gh auth status
Whola! The setup is finished now. Phew… 🥴